SupplyLogic Update Program
The SupplyLogic Update program is used to download the latest SupplyLogic software. SupplyLogic must already be installed on the computer before doing an update. The Server should always be done first then SupplyLogic should be opened on the server to verify the version number via Help, About. After the server version has been checked, each SupplyLogic client computer can then be done.
Click on the link below to download the SLUpdateInstall.zip. By default, it will download to the downloads folder. After downloading, double-click the zip file and extract to the c:\SLInstallCD folder. Finally, double-click the c:\SLInstallCD\Setup.exe file to install the program. NOTE: IF YOU DON'T UNZIP TO THAT EXACT FOLDER, YOU MAY HAVE UNEXPECTED ISSUES LATER.

Server Update : Step by Step
Follow these instructions to update the SupplyLogic server.
- 1. Get everyone out of SupplyLogic on the server and all clients.
- 2. Restart the server to make sure everyone is out.
- 3. Right-Click the SLLockManager icon on the taskbar and select Close
- 4. Right-Click the SLTransManager icon on the taskbar and select Close
- 5. Click the SLUpdate icon on the desktop
- 6. From the menu select Update, Software.
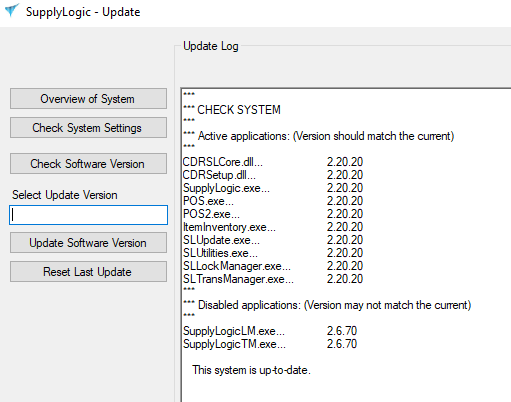
- 7. Click the Check Software Version button to see what version you are at.
- 8. Delete the text in the latest update box to grab the latest version
- 9. Click the Update Software Version button to update to the latest version.
- 10. After the update is done, click the Check Software Version button.
- 11. Verify that all files listed have the same version #.
- 12. Verify that the SLLockManager and SLTransManger have opened.
- 13. Run SupplyLogic and select Help, About from the menu.
- 14. Verify you can open the Customer Mainteance screen.
Email SLSupport@CDRSoftware.com if you have problems with the update. Be sure and include details of what step you are stuck on.